Below is a step-by-step guide on how to build a Shopify store. If you have been looking to build an e-commerce centre with the highly-popular CMS tool, you are soon to find out that building a Shopify store is as easy as pie.
Well, that’s if you follow all the instructions in here to the letter.
If, for one reason or the other, you run into snags during the creation of your online store, reach out to me in the comments section and I’ll get back to you as soon as I can.
What is Shopify?
Shopify is a CMS package which was specially designed for use by those who would like to have an e-commerce platform hosted online in a few easy steps.
It is the ideal solution for those who do not have any coding experience and would still like to sell their products on an online store while not having to pay the premium charged by developers.
By committing to the use of Shopify, the entrepreneur will have to pay a small fee to the company behind the software on a monthly basis.
The good news is that when the store starts running smoothly, the website will start paying for itself while you just reap the gains.
Likewise, the payment is highly justified.
While you would have had to pay for hosting elsewhere, Shopify allows you build your site on a framework of what is one of the strongest servers out there. That way, your products and earnings, as well as user data from interacting with your site, are kept very secure.
Shopify vs WooCommerce
One of the biggest dichotomies in the market these days is which one to go for in the duo of Shopify and WooCommerce. While Shopify is a standalone platform, WooCommerce is merely a plugin that can be used to transform an ordinary WordPress website into an online store in mere minutes.
The reasons why I will advise Shopify over WooCommerce is because of the industry-specific need it addresses. While Shopify was built for e-commerce, WordPress wasn’t, so WooCommerce is just a modification.
That is not to mention that WooCommerce will require that you have a little bit of coding experience when you get to some points in developing it.
Creating a Shopify Store (in 20 Mins or Less)
Now that you know why Shopify is probably the better option of the duo, you will want to set up your own online marketplace too. In as detailed a way as steps can get, here are the things to do when building a Shopify store
1. Sign Up
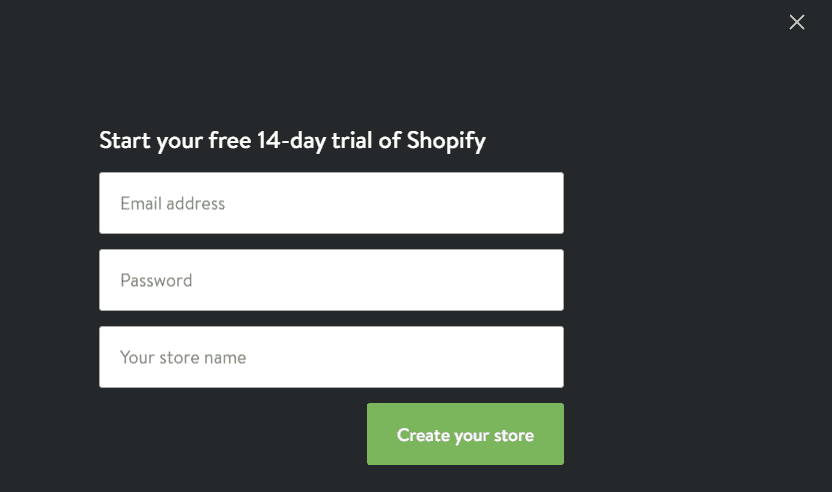
The first thing you will want to do is head over to the official Shopify website and sign up (use the ‘Get Started’ button) to create your own marketplace. Details such as your email address, password and store name will be asked of you at this stage.
You will then be given the option to choose between a brick and mortar store or an online establishment. Note that the goal of this tutorial is to get you on your own online shop, so go ahead and choose the corresponding option.
Click Next and fill in all necessary details on the next page.
Click Next again and you fall onto a page where you are asked to tell Shopify a little bit about yourself. Use this page judiciously.
2. Add Products
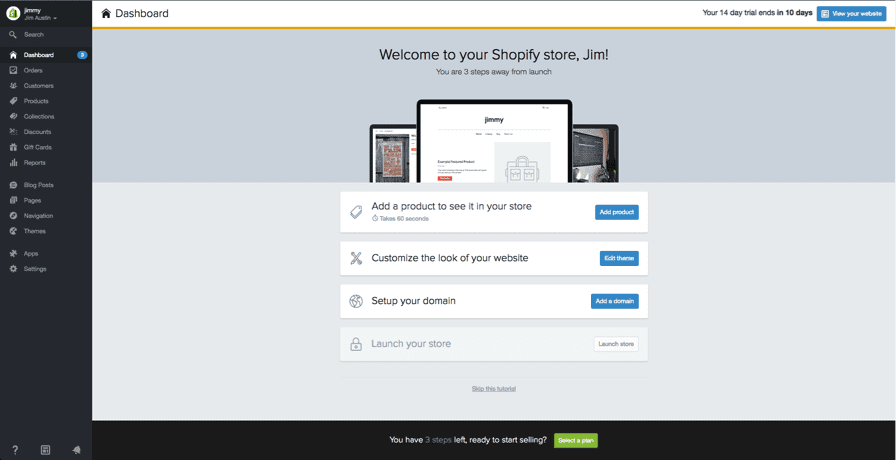
On entering the back-end, you start getting prompts that leads you to adding your products. The first prompt asks you to add a product after which you are taken to a page that looks so much like the WordPress editor.
Here, you can enter the title, description, price and vendor of the item(s) you are listing. There are a ton of fields to fill here. Complete as much as you deem necessary
3. Customise the Site
At the time of creation, your website looks like the generic bunch of Shopify stores first created. Look for the ‘Customise the Look of Your Site’ button and click on it. You will be able to make tweaks from as little as colour themes to as massive as the site logo.
Under this tab, you should also look for the button that leads you to the theme store. There, you can browse hundreds of different themes to make your Shopify store even more personal.
If you mean business, you should also checkout all in one selling solution for Shopify like Debutify.
4. Domain Setup
The site is beautiful and ready to be seen now. How about we do allow it to be seen?
That is what you will do next by heading into the ‘Add a Domain’ section. You will be asked whether you are going with a new domain or importing an existing one. Since we are here together, odds are that you are starting a new one.
The system will walk you through the process from there up until the point of activation. After making your purchase and activating the website, enter the specified address into your browser panel and see it come up – live!
5. Activate Payment Gateway
When people buy something on your website, you want them to be able to pay, don’t you? More than that, you also want to receive your money, right? To the left of your dashboard is a tab named ‘Payments.’
You will be able to select a variety of payment processors (all tested and trusted safe and secure) from there to handle your transactions. There is even one from the official developers of Shopify that is also quite easy to implement.
When you have selected which one you want, the said processor will walk you through the installation and implementation process.
6. Launch
Done with everything we have stated above? Crossed all your is and dotted your ts? Guess what? You can now press the launch button. Time to start directing traffic to the website and raking in some sales, don’t you think?


