Having been hit hardest by Covid-19, 2020 was the year of change, transformation, adoption, and progression, not only for the business world but also for the education industry. The sudden outbreak of the pandemic resulted in the closure of schools across 186 countries, leaving over 1.2 billion children out of the classroom.
The educational institutions that were based solely on traditional learning methods before the crisis suddenly shifted entirely to online overnight and realized the significance of making eLearning more responsive, flexible, and agile. All thanks to digital technologies and online presentation platforms that enabled the education sector to sail through these tough times smoothly.
One such tool that has been most preferred by educators in imparting education seamlessly during the pandemic is Google Slides. From amazing add-ins for formative assessment to video controls, Google Slides is embedded with outstanding features and has all that you need to make eLearning dynamic. Want to know more about what makes Google Slides the most sought-after tool for teachers and instructors? Read on, and delve deeper!
8 Amazing Things You Can Do with Google Slides
Looking for some useful tips on taking full advantage of Google Slides in eLearning? Here we go!
Tip #1: Create an Interactive Table of Contents
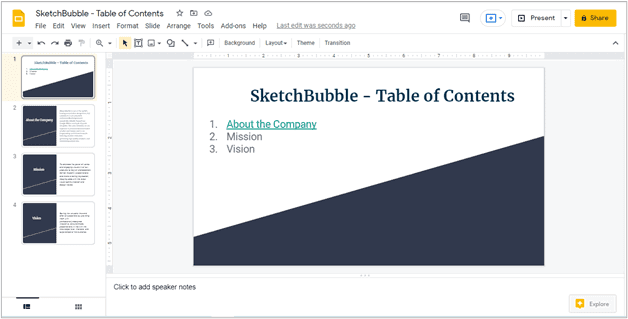
Google Slides let you make your decks more interactive and collaborative by enabling you to link every topic of the Table of Contents with the individual slides, making it easy for the students to navigate through the content.
How to do it?
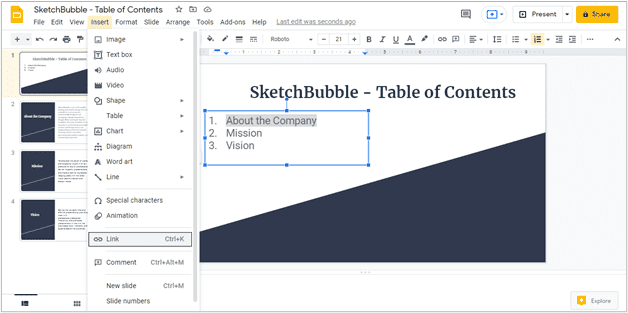
After creating the entire slide deck, add a slide to the beginning and name it “Table of Contents.” Include the titles of all the topics that you have included in each individual slide. Then, select each title and go to Insert > Link.
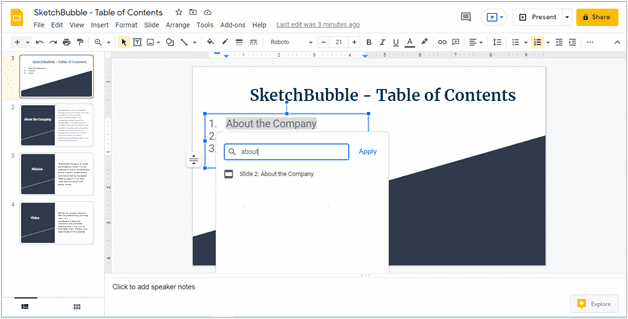
Here, You will get a list of all the slides created in the deck. Choose the slide that you want to link to that particular topic. And if you don’t get the list, you can search the slide by its name. Then, click on “Apply.”
The hyperlinked title will look like this:
For more details, watch out this video:
Tip #2: Create an eBook
Creating an eBook with Google Slides is so much easier as it allows you to edit images, add shapes, graphics, layer text boxes, borders, and backgrounds. Below is the stepwise process.
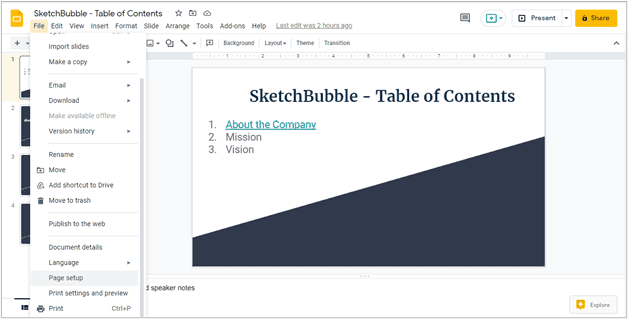
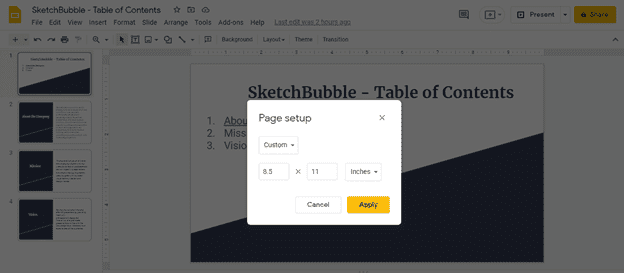
1. Customize the size – go to File > Page Setup > Custom.
Here, choose the size in which you want to create the slides. 8.5 X 11 inches is the standard size for eBooks. Then click on “Apply.”
2. Add the content. Create header, footer, title, and cover page. Add links to useful websites and resources to make it more interactive. Create a Table of Contents as described above.
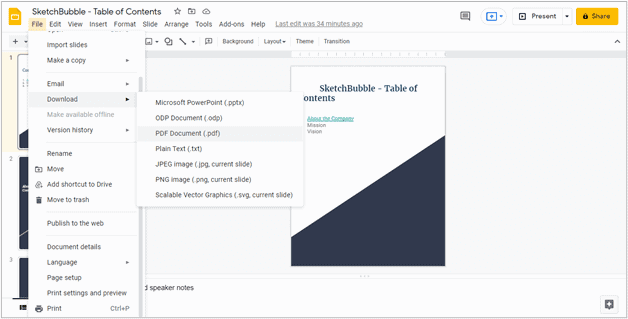
3. After completing the content, convert or download the eBook as PDF – File > Download > PDF Document (.pdf). You can also upload it on Google Drive to get a shareable link.
Learn more here:
Tip #3: Increase Learner Engagement by Embedding Videos
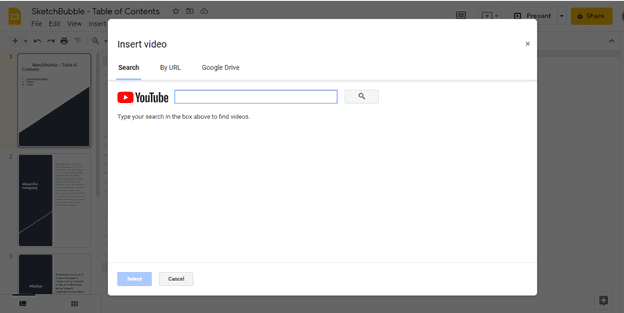
Google Slides comes with a feature of video integration to make your eLearning course more immersive and effective. If you already have informational videos or webinars uploaded on YouTube which can help learners in one or the another way, you can simply embed them into your Google Slides by going to Insert > Video.
It will make the learning process for students a lot more easy and convenient by providing all the relevant stuff at one centralized location and saving their time in searching the videos on the web.
Tip #4: Insert Images into Google Slides for Better Learning Experience
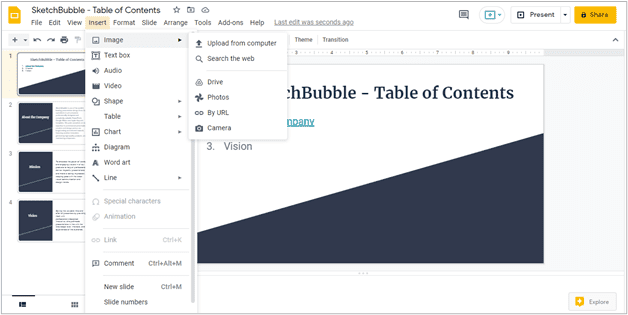
Google Slides provide you various options to insert images:
● You can upload the images saved on your computer or Google Drive.
● You can search the web for the images.
● You can also insert the images by the URL.
You just need to go to Insert > Image. Choose from where you want to insert images.
If you don’t have relevant images available on your desktop and have no time to prepare the required graphics from scratch, you can leverage the pre-designed and editable visuals provided by various online designing platforms.
Tip #5: Sharing Training Modules and Slideshows is Easy with Google Slides
You can easily share training modules, webinars, and presentations with the learners through Google Slides. As Google Slides is easier to share and use than PowerPoint, most eLearning professionals prefer this tool to share learning content with specific groups of learners on a regular basis.
You can also control who can see your slideshows by sharing them with specific learners. You can also decide whether a specific learner can only view the shared presentation or can also edit it.
Tip #6: Break the Boredom by Inserting Audio Content
If you want to make the eLearning modules more understandable, you can add narration recorded in your own voice to the slideshows or video presentations. You can record your voice using a free recording application.
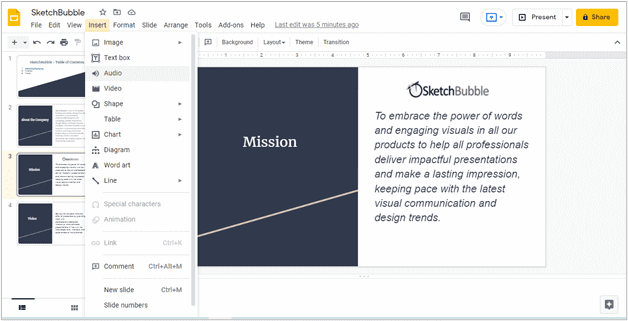
Once you create your audio file, upload it on your Google Drive. Now, you can add this audio file to your Google Slides by going to the slide where you want to insert it and then clicking on Insert > Audio.
Choose the audio file that you want to insert in that particular slide and then click on “Select.”
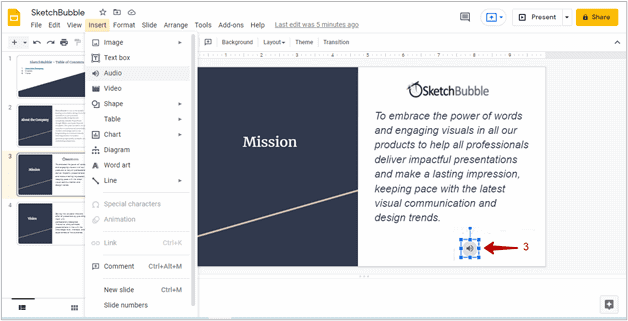
A speaker-shaped icon will appear on your slide, which you can easily drag to change its placement. The audio can be played by clicking on this speaker icon.
Tip #7: Leverage Google Slides to Create Group Assignments
Let learners collaborate and interact with each other by assigning them group assignments or projects through Google Slides. For example, you can ask learners to prepare a slideshow depicting the key concepts that they have learned throughout the eLearning course.
You can also ask them to work together and prepare a presentation on a particular topic. Here, Google Slides’ feature of adding or modifying the presentation will help students easily participate in such group collaboration activities, which in turn, increase their engagement with the eLearning modules.
Tip #8: Make eLearning Modules Unique Using Add-ons
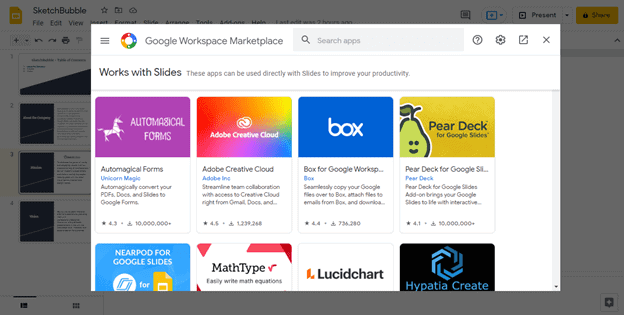
You can make your eLearning course more intuitive and interactive by including add-ons provided by Google Slides. Just go to Add-ons > Get Add-ons. It will open the add-ons store, where you can look for specific add-ons by typing in the search bar or browse the featured add-ons. After choosing the add-on, install it. The installed add-on will be available in the Add-ons menu.
Here are a few useful add-ons for eLearning professionals:
1. Pear Deck – For creating custom questions and formative assessments
2. Kaizena – For providing high-quality, fast feedback on student work
3. Math Equations – For including math equations in the form of images
The Final Takeaway
On the one hand, covid-19 has confronted us with the uncertainty of human existence; on the other hand, it has taught us many important life lessons, compelling us to find innovative ways to address the challenges brought by this crisis.
One of the biggest lessons the education sector has learned from Covid-19 is that learning is not confined to geographical boundaries and infrastructural challenges. Using the right tools, such as Google Slides, the potential challenges posed by eLearning, such as keeping students focused and motivated, can be overcome easily, thereby continuing the education in all circumstances.
Hopefully, this blog post has given you some insights into how Google Slides can be utilized in eLearning. We would like to know your thoughts in the “Comment” section. And if you like the blog post, do share it on your social media handles.
Author Bio:
Ashish Arora is the Co-Founder of SketchBubble.com, a leading provider of result-driven, professionally built presentation templates. Travelling the world to gather new creative ideas, he has been working in the digital marketing space since 2007 and has a passion for designing presentations. You can also find him on Twitter or LinkedIn.


