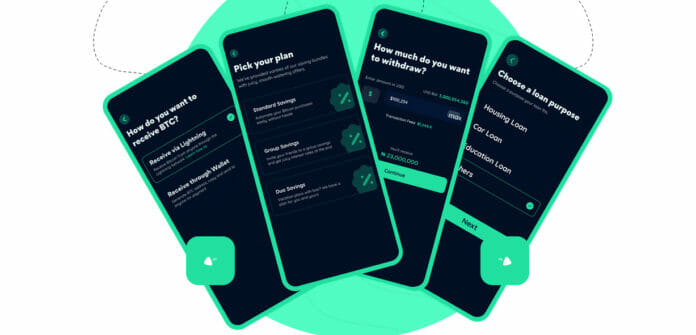
Bitnob is an easy-to-use Mobile App that enables users to buy, sell, receive, send, pay, and borrow with Bitcoin in Naira using a fast, secure, and reliable peer to peer (P2P) solution. Available for both Android and iOS, you can get loans with your Bitcoin holding as your collateral.
Bitnob also supports KYC, which makes it compliant with international best practices for fintech companies. The App also enables you to save in US Dollars (USD).
With the recent cryptocurrency market fluctuations, this is just the perfect time to enter the market and Bitnob has all the tools you need to buy and save in Bitcoin. Over the last couple of days, we have been exploring the app and will be sharing our experience in this article.
How to Download the Bitnob App
The Bitnob App is available for both Android and iOS. Just visit the Google Play Store or App Store to download the app. Once you have completed downloading and installing the app, you can now launch the app. It is now time to set up your app.
Setting up your Bitnob App
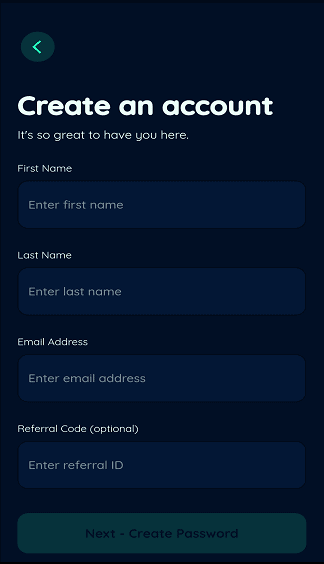
When you launch the app for the first time, you will be required to create an account. You just have to fill a simple form with your name and email address. There is also an option for a referral code (if you have one). You will also be required to verify your email address and phone number to complete the process.
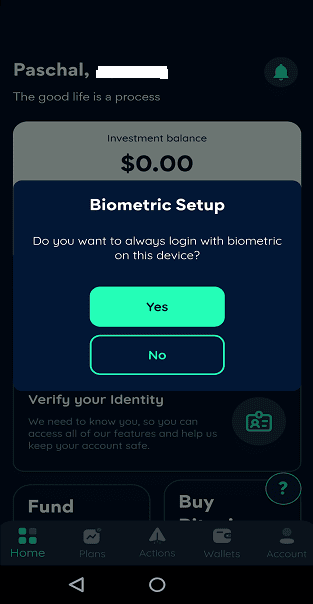
Before setup is complete, you will be given an option to login always with Biometric on the device. This will create added security with fingerprint scan required for each login to the app. The overall setup process is simple and can be completed in under 5 minutes.
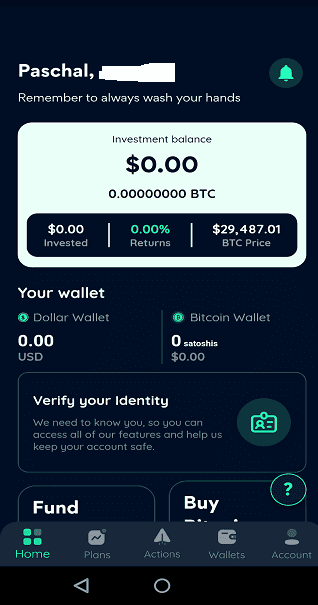
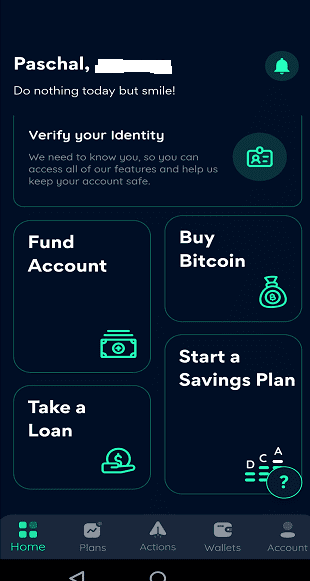
Once you are done with the setup, you will be welcome to the home screen where you will see a dashboard for tracking your investment as well as buttons for doing your KYC, funding your USD wallet, buying Bitcoin, taking a Loan, and subscribing to the Savings plan.
The UI
The UI is clean and intuitive. You will never have to guess what each button is for. If you want to fund your wallet, you will clearly see the large Fund Account button on the home screen. Similarly, if you want to buy Bitcoin, you will also see the Buy Bitcoin button.
The story is also the same for Verifying your Identity, taking a Loan, and starting a Savings Plan.
On the lower end of the screen, you will see five floating icons labelled Home, Plan, Actions, Wallet, and Account, which are self-explanatory.
Home – This is what we have been discussing so far. It offers a dashboard that enables you to track your savings and investment as well as a quick access to the most important features of the app.
Plans – This is where you create your savings plans.
Actions – This is where you find options to fund your wallet, take a loan, or buy Bitcoin. You can also withdraw your funds from here as well as set up your Lightning Address.
Wallet – You can access your Bitcoin and USD wallets from here.
Account – This is where all the administration stuff resides. Here you will find options to add your Next of Kin, do your KYC, add the account where your payout would be withdrawn to.
How to Fund your Bitnob Wallet
Funding your Bitnob wallet is easy. On the home screen, you will see the Fund Account button. This will enable you to use P2P to fund your wallet in a couple of minutes. In my own experience it took me less than 2 minutes to fund my wallet.
Here is how to fund your Bitnob wallet:
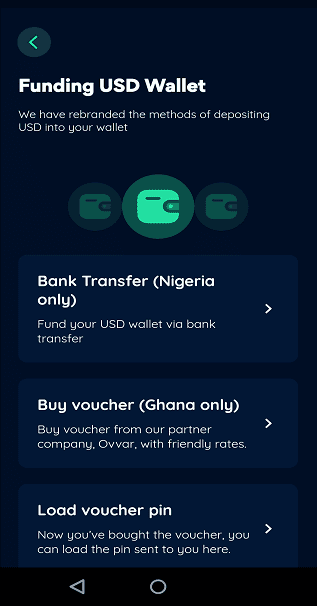
Step 1: Press the Fund Account button. This will take you to a page that shows your options for funding your account.
Step 2: Press the Deposit Option applicable to your country.
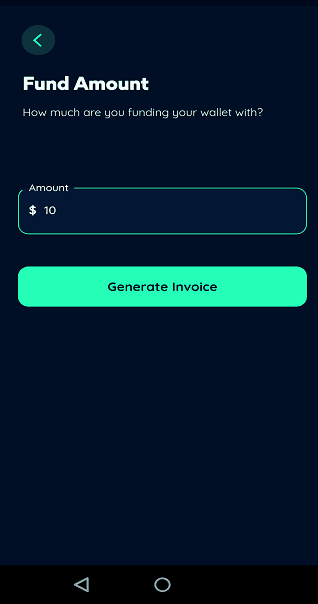
Step 3: Enter the amount in USD that you want to deposit and press the Generate invoice button. The Invoice page will be displayed at this time.
Step 4: Using the details on the invoice, send the amount in the Total amount in Naira field to the account provided and press confirm payment. In a few minutes the fund will be in your wallet. Note that the invoice is valid for 1 hour 30 minutes. This is the amount of time you have to send the payment to the account on the invoice.
The process is fast and seamless. The little issue I had was with the short timeout period of the app. Between the time it took to get to another app to send the payment to the account on the invoice, the app had already timed out at least one time, which means I had to log in again.
However, the good thing is that once I logged back in, I was able to start where I stopped by confirming the payment.
Once you have funds in your USD wallet, you can use it to buy Bitcoin. You can also use your deposit to send Bitcoin directly to anyone without having to buy Bitcoin first.
This is a powerful tool if you prefer to keep your funds in a more stable currency and only use crypto when necessary. You can send Bitcoin to anyone from your USD wallet all you need is their Lightning address or BTC Wallet address. You can also send USD to another Bitnob user directly from the App.
How to Buy Bitcoin on Bitnob
With your account funded in USD, you now have all you need to buy Bitcoin on the App. Here is how:
Step 1: Press the Buy Bitcoin button.
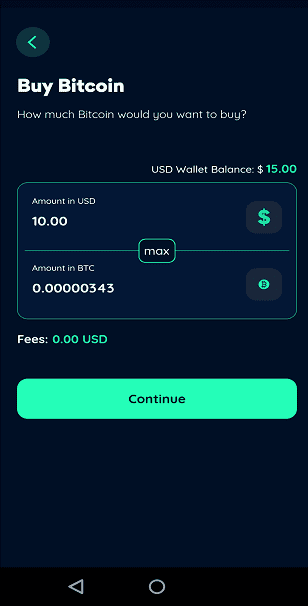
Step 2: Enter the amount in USD you wish to buy in Bitcoin. You see the amount of BTC the Dollar value will be able to buy.
Step 3: Press the Continue button. Enter a Note for the transaction to enable you remember it in future and hit the Next button.
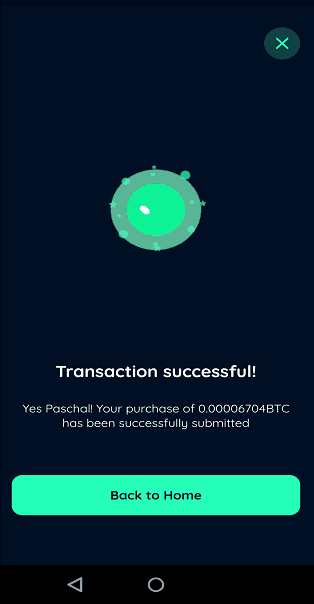
Step 4: Read the Transaction Summary and Press the Complete Purchase button to conclude the transaction.
Buying Bitcoin enables you to save in Bitcoin. It also enables you to take a loan using the deposit in your Bitcoin wallet as collateral. Once you have Bitcoin in your wallet you can sell it (hopefully when the price goes up). You can also send Bitcoin to anyone or another Bitnob user.
How to Sell Bitcoin on Bitnob
Selling Bitcoin on Bitnob is easy and comes with a 0.1% transaction cost. Here is how to sell Bitcoin on the Bitnob App:
Step 1: Press the Wallet icon. This should take you to the wallet area. Swipe left or right to make sure you are in the BTC wallet.
Step 2: In your BTC wallet, press the Sell button
Step 3: Enter the amount in USD you wish to sell. The App will display the amount in BTC as well as the fees. In my test I decided to sell $2.00 worth of BTC and my fee was calculated as 2 cent ($0.02).
Step 4: Press the Continue Button
Step 5: Enter a Transaction Note and press Next
Step 6: Review the transaction summary and press Complete BTC Sale button
How to Withdraw Fund from your Bitnob Wallet
Step 1: Press the Wallet icon. This should take you to the wallet area. Swipe left or right to make sure you are in the USD wallet.
Step 2: In the USD wallet, press the Withdraw button
Step 3: Enter the Amount you want to receive. The App will show you how much in Naira you would receive and the transaction fee. For a withdrawal of $3 the transaction cost was 3 cents ($0.03) which means 0.1% transaction fee.
Step 4: Select the account to send the fund to. If you have not saved an account yet, you would be able to save the account and continue with the transaction.
Step 5: Enter a Transaction Note
Step 6: Review the Transaction Summary and press the Proceed button.
Step 7: Enter your PIN to complete the transaction.
The fund should be in your account in a couple of minutes.
More Features of the Bitnob App
Bitcoin Savings Plan
This is a simple savings solution that enables you to save in Bitcoin. It is just like having a piggy bank for Bitcoin. You set an amount you want to save and how often you want to save it, say daily, weekly, or monthly.
So, rather than saving a large amount at one time, say $100, you can spread it over smaller daily, weekly, or monthly savings like $1 daily for 100 days or $5 weekly for 20 weeks.
Loans
Bitnob has a feature that enables you to take a loan with your Bitcoin as collateral. This is a great way of getting cash without having to sell your Bitcoin.
This ensures you sell your Bitcoin when you want to and not because of an emergency. Minimum loan amount is $50, and tenor can range from 3 months to 12 months. There is also a helpful loan calculator in the app to give you an idea on the collateral value required for the amount of loan you need and the interest you would have to pay.
Lightning Network Support
Bitnob supports the Lightning Network, which enables you to send Bitcoin fast to anyone with minimal fees. You can send as little as $1 worth of Bitcoin to anyone all you need is their Lightning address.
You can also use the lightning network to buy virtual cards and gift cards for shopping on US sites.
Another powerful feature that comes with the Lightning support is that you can receive money from a CashApp user in the United States. Just create a Lightning Invoice and send it to them asking them to pay you via CashApp and you would have the fund in no time in your Bitnob wallet.
This means you can receive payment from the United States and Europe in no time in your Bitnob App.
Custom Payout
Bitnob has a feature that enables you to decide how you want to be settled when someone sends you money on Bitnob. You can select to receive the fund in your USD wallet or Bitcoin wallet.
You can also select to share the inflow between your BTC and USD wallet using a ratio you preset. For example, you can set it to 50:50 or that 80% goes to USD and 20% to BTC.
Finally, you can set it up in such a way that the inflow is converted to Naira (There are also options for Cedis and US Dollar) and sent to your bank account.
This feature can be accessed via the Actions icon. Tap the Change BTC payout to set how you want your inflows handled.
Verify your Identity
KYC (Know your Customer) is an essential feature for most financial services providers.
It enables a financial services provider to verify the identity of its customers. This is done by requiring the customer to provide some relevant documents and details that will aid in the processes of verifying their identity.
This enables the service provider to protect itself and its customers from exposure to fraud and being used for illicit activities.
Usually, the more information a user provides to the financial services provider, the more features are accessible to them and the higher the volume of transactions they can engage in.
Next of Kin
This is a thoughtful inclusion by Bitnob. It enables you to provide the name and contact information of the person that your values of your BTC and USD wallets should be handed over to if the unthinkable happens. You will find this option in the Accounts area.
Security
Security is a crucial feature for any service that deals with funds. Bitnob takes the security of your funds seriously with support for Two Factor Authentication using the Google Authenticator App to generate a unique code that you must enter each time you login.
The App also requires you to setup a PIN, which you must enter each time to authorise all outflows from Bitnob.
Support
Bitnob has live support. Just tap the floating question mark icon on every page. There you can chat with a support staff that would help you with any issue you may have.
However, before using live support, you can also go through the helpful FAQ options. It is possible that what you are looking for is already answered. The FAQ is also well arranged to make it easy to navigate to your solution.
Make Money Referring your Friends to Bitnob
Bitnob has a referral code that enables you to invite your friends to Bitnob and if they do you earn some points that you can convert to Bitcoin.
Final Thoughts
Bitnob offers a clean UI that is intuitive and easy to use making it great for beginners. It might just be the app you are waiting for to buy your first Bitcoin.
It enables you to fund your wallet in a stable currency like the USD. The ease with which you can buy the US dollars is perhaps its greatest strength. In just 2 minutes you could fund your account with USD using the Naira.
We also love the fact that you can save in USD and spend in BTC shielding you from the volatility of Bitcoin. In addition, the fact that once you invest in Bitcoin you can get urgent cash without having to sell your Bitcoin by taking a loan is a plus. The support for the Lightning Network is also great.
The app does everything well. The only one issue I observed was the short timeout period, which means that for some transactions you would have to login at least twice before you are done.
Aside from these, the Bitnob app is a great App to buy, save, and borrow in Bitcoin. You should try it.
Related Topics
- How to Buy Bitcoin in Nigeria
- Sell Bitcoin in Nigeria
- Top 5 Criticisms Labelled Against Bitcoin by Governments
- Everything you need to Know about Bitcoin Exchanges
- How to Buy USDT in Nigeria with Naira
- Yellow Card: Buy and Sell Bitcoin, USDT in Naira
- What is a Stablecoin and How Does it Differ from other Cryptocurrencies
- Top Bitcoin Exchanges you should Know in Nigeria
- Common Cryptocurrency Jargons you Need to Know
- Top Less Risky Cryptocurrencies as an Investment


